There are three ways that an instructor may take attendance in the Moodle grade book. They may enter one attendance grade out of a total of points, enter a participation grade for each class date, or use the attendance activity offered in Moodle.
The first option requires keeping the attendance in a manual grade book initially. It is advised that you add this total grade for attendance at the end of the semester so that your students do not appear to have a lower grade than they actually do. You also cannot utilized excused absence without giving total credit. Option two, allows one to add an attendance grade for each class day, while giving you the option to excuse an absence with no points without this adversely affecting the students grade. The only disadvantage is the volume of manual items to be entered into the grade book. All three options allow the instructor to record the student’s attendance vs. having students record their own. It is recommended that instructors utilize options 2 and 3 for optimum attendance recording.
Attendance Step-Up #1
1. Enter Participation grade out of total points. Go to homepage of course > Go to “Grade book Setup” > Select “Add grade Item” > Give item name (see screenshot below) > Save Changes > The assignment is now in your grade book.
Attendance Step-Up #2
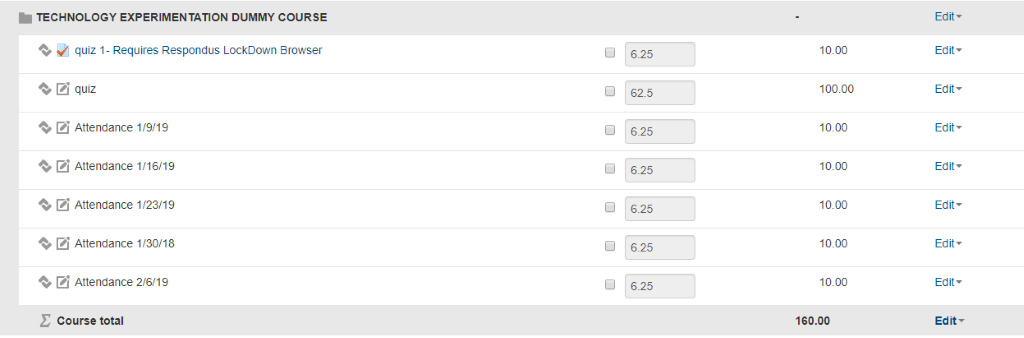
Adding a grade for each class day. Follow the same procedures in the first example > You will need to enter a grade item for each attendance date > Set your points for each of them > You may want to give the items a name such as “Attendance [insert date here]” .
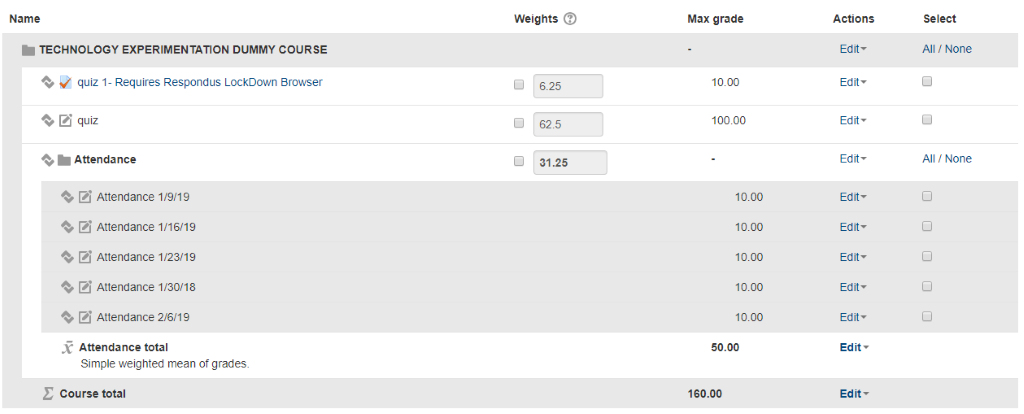
Note: After creating these attendance grades, you may want to enter a category for attendance.
Attendance Step-Up #3
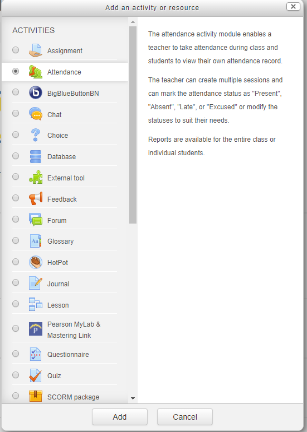
Attendance Activity in Moodle. Go to Homepage of course > Turn the editing option on > Select “Add activity or resource” > Select the “Attendance” activity. It should be the second option .
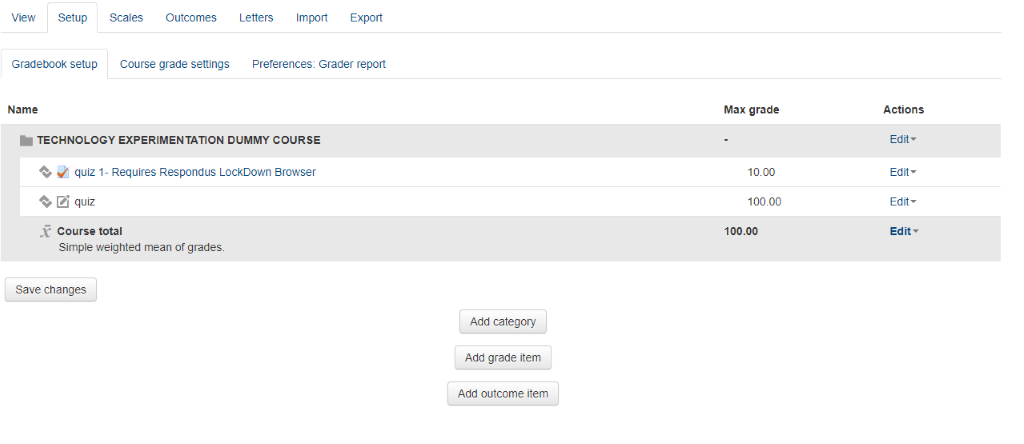
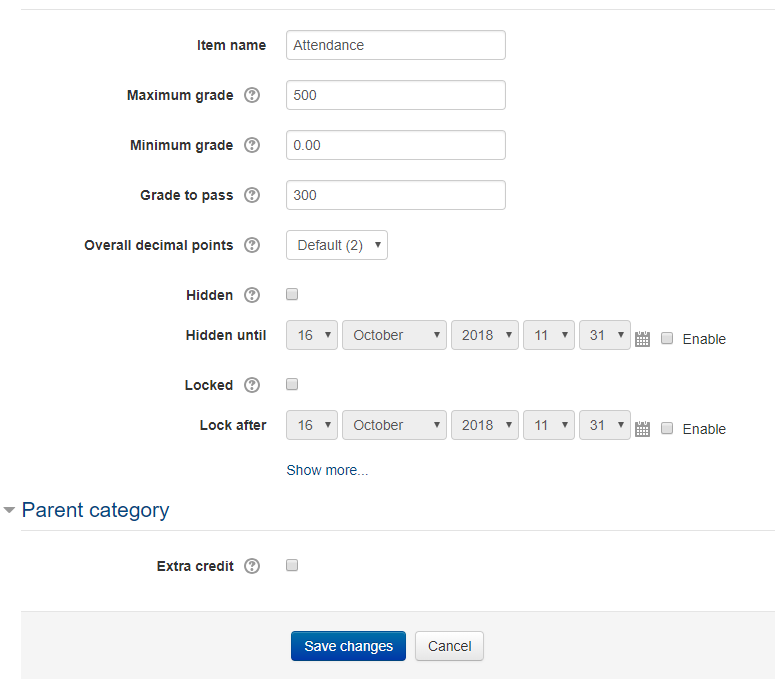
Once added, you may give the assignment a maximum amount of points, categorize it, and list the minimum amount of points required to pass by going to the “Grade” section.
Scroll down to the bottom of the screen and save the changes. In this example, we are going to save and return to the course.
In the home page of your course, go to the Gradebook > Click on the “Attendance” activity.

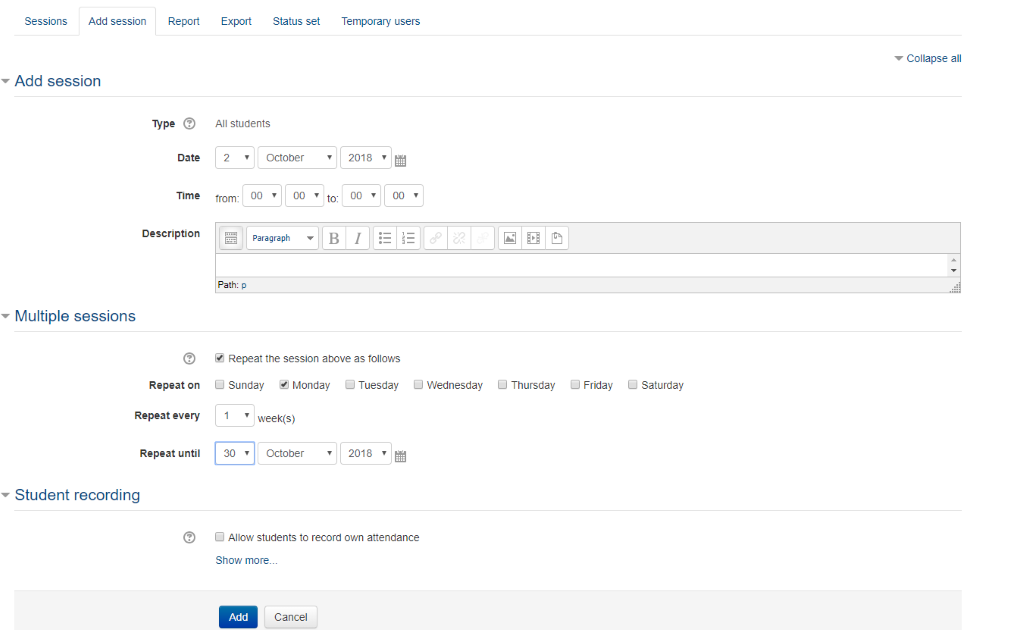
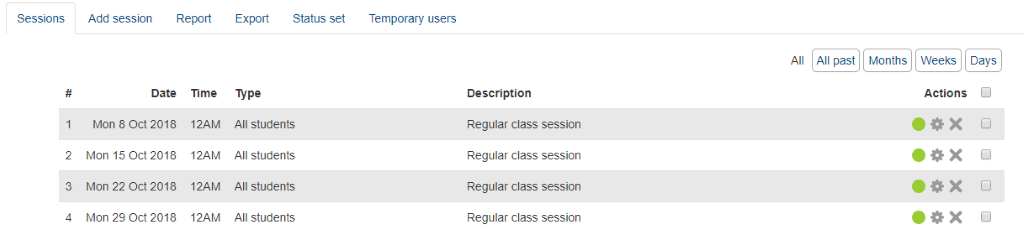
Go to “Add Session” > In “Add Session” input the date that the course will begin.
In “Multiple Sessions”, click on “Repeat the session above as follows” and select the day(s) that you wish for the sessions to repeat. You will want this to repeat every week. Input the date you wish for the repeating to end.
Leave the option for students to record their own participation unchecked > Select “Add” > You should now see a list of class dates when selecting the “Sessions” tab.
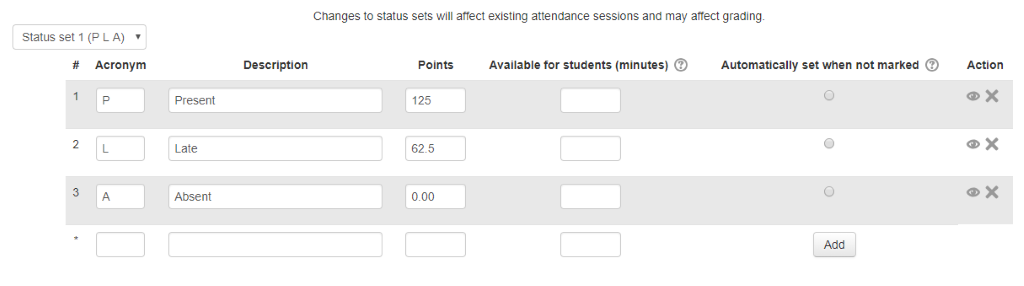
Go to “Status Set”. The standard acronyms are “P”, “E”, “L”, and “A” and the point values are 2, 1, 1, and 0 respectively. You have the option to remove these.
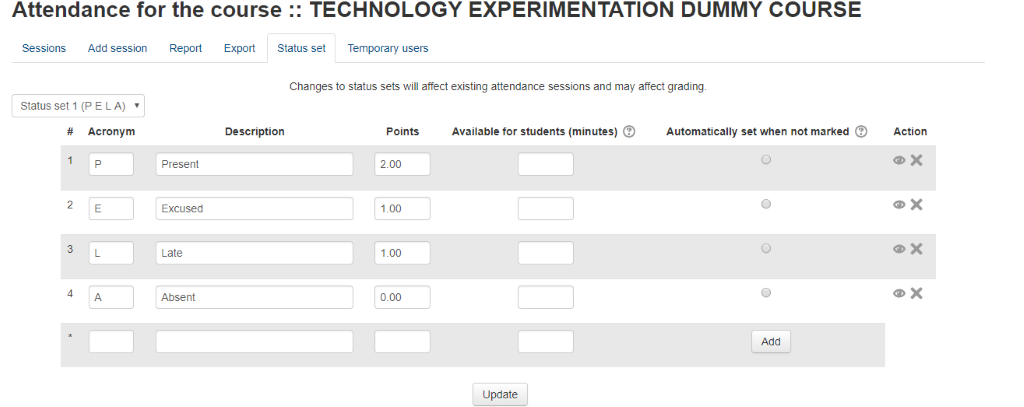
Once you have your acronyms to your liking, select the “Update” button. You have the option to edit the point values, acronyms, etc. as well as deleting a status by clicking the “X” to the right
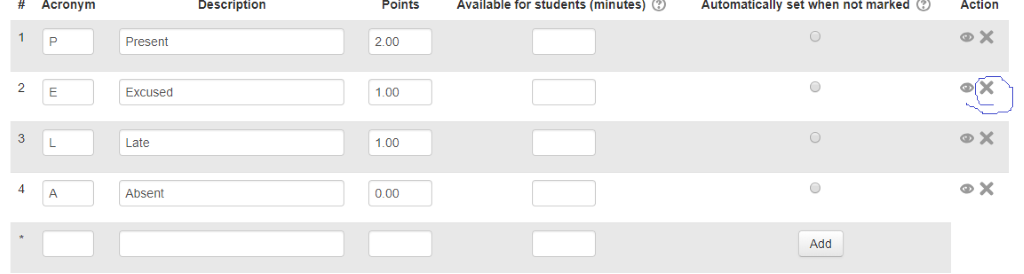
In this example, the “Excused” status has been deleted and the point values have been modified to match the total amount of possible points for the course.